SSO (Single Sign-On)
Integrate Single Sign-On (SSO) with Socket to streamline login processes, enhance security, and simplify user management, now available for Enterprise plan customers with support for over 20 identity providers.
Integrating SSO with Socket
Introduction
Benefits of SSO
- Simplified Access Management: Centralized user authentication streamlines login processes.
- Enhanced Security: Reduces the need for multiple passwords, lowering the risk of phishing attacks.
- Session Management Capabilities: Provides more control over user authentication flows and session management.
Benefits of Enabling SSO on the Socket Platform
Enabling Single Sign-On (SSO) on the Socket platform simplifies your login process and enhances security. SSO is now available for all customers on the Enterprise plan, supporting 20+ identity providers. If your company uses an identity provider that supports SAML or OIDC protocols, integrating SSO with Socket is straightforward.
Availability
SSO is available exclusively for customers on the Enterprise plan.
Supported Identity Providers
Our SSO integration supports a broad range of identity providers through WorkOS, including:
- Okta
- Google Workspace
- Microsoft Azure AD
- And more (total of 20+ providers)
Configuration Guide
Navigating to the SSO Settings
-
Access the Socket Dashboard: Go to the Socket Dashboard.
-
Settings Menu: Select Settings from the main menu.
-
Security Settings: Choose SSO from the settings options.
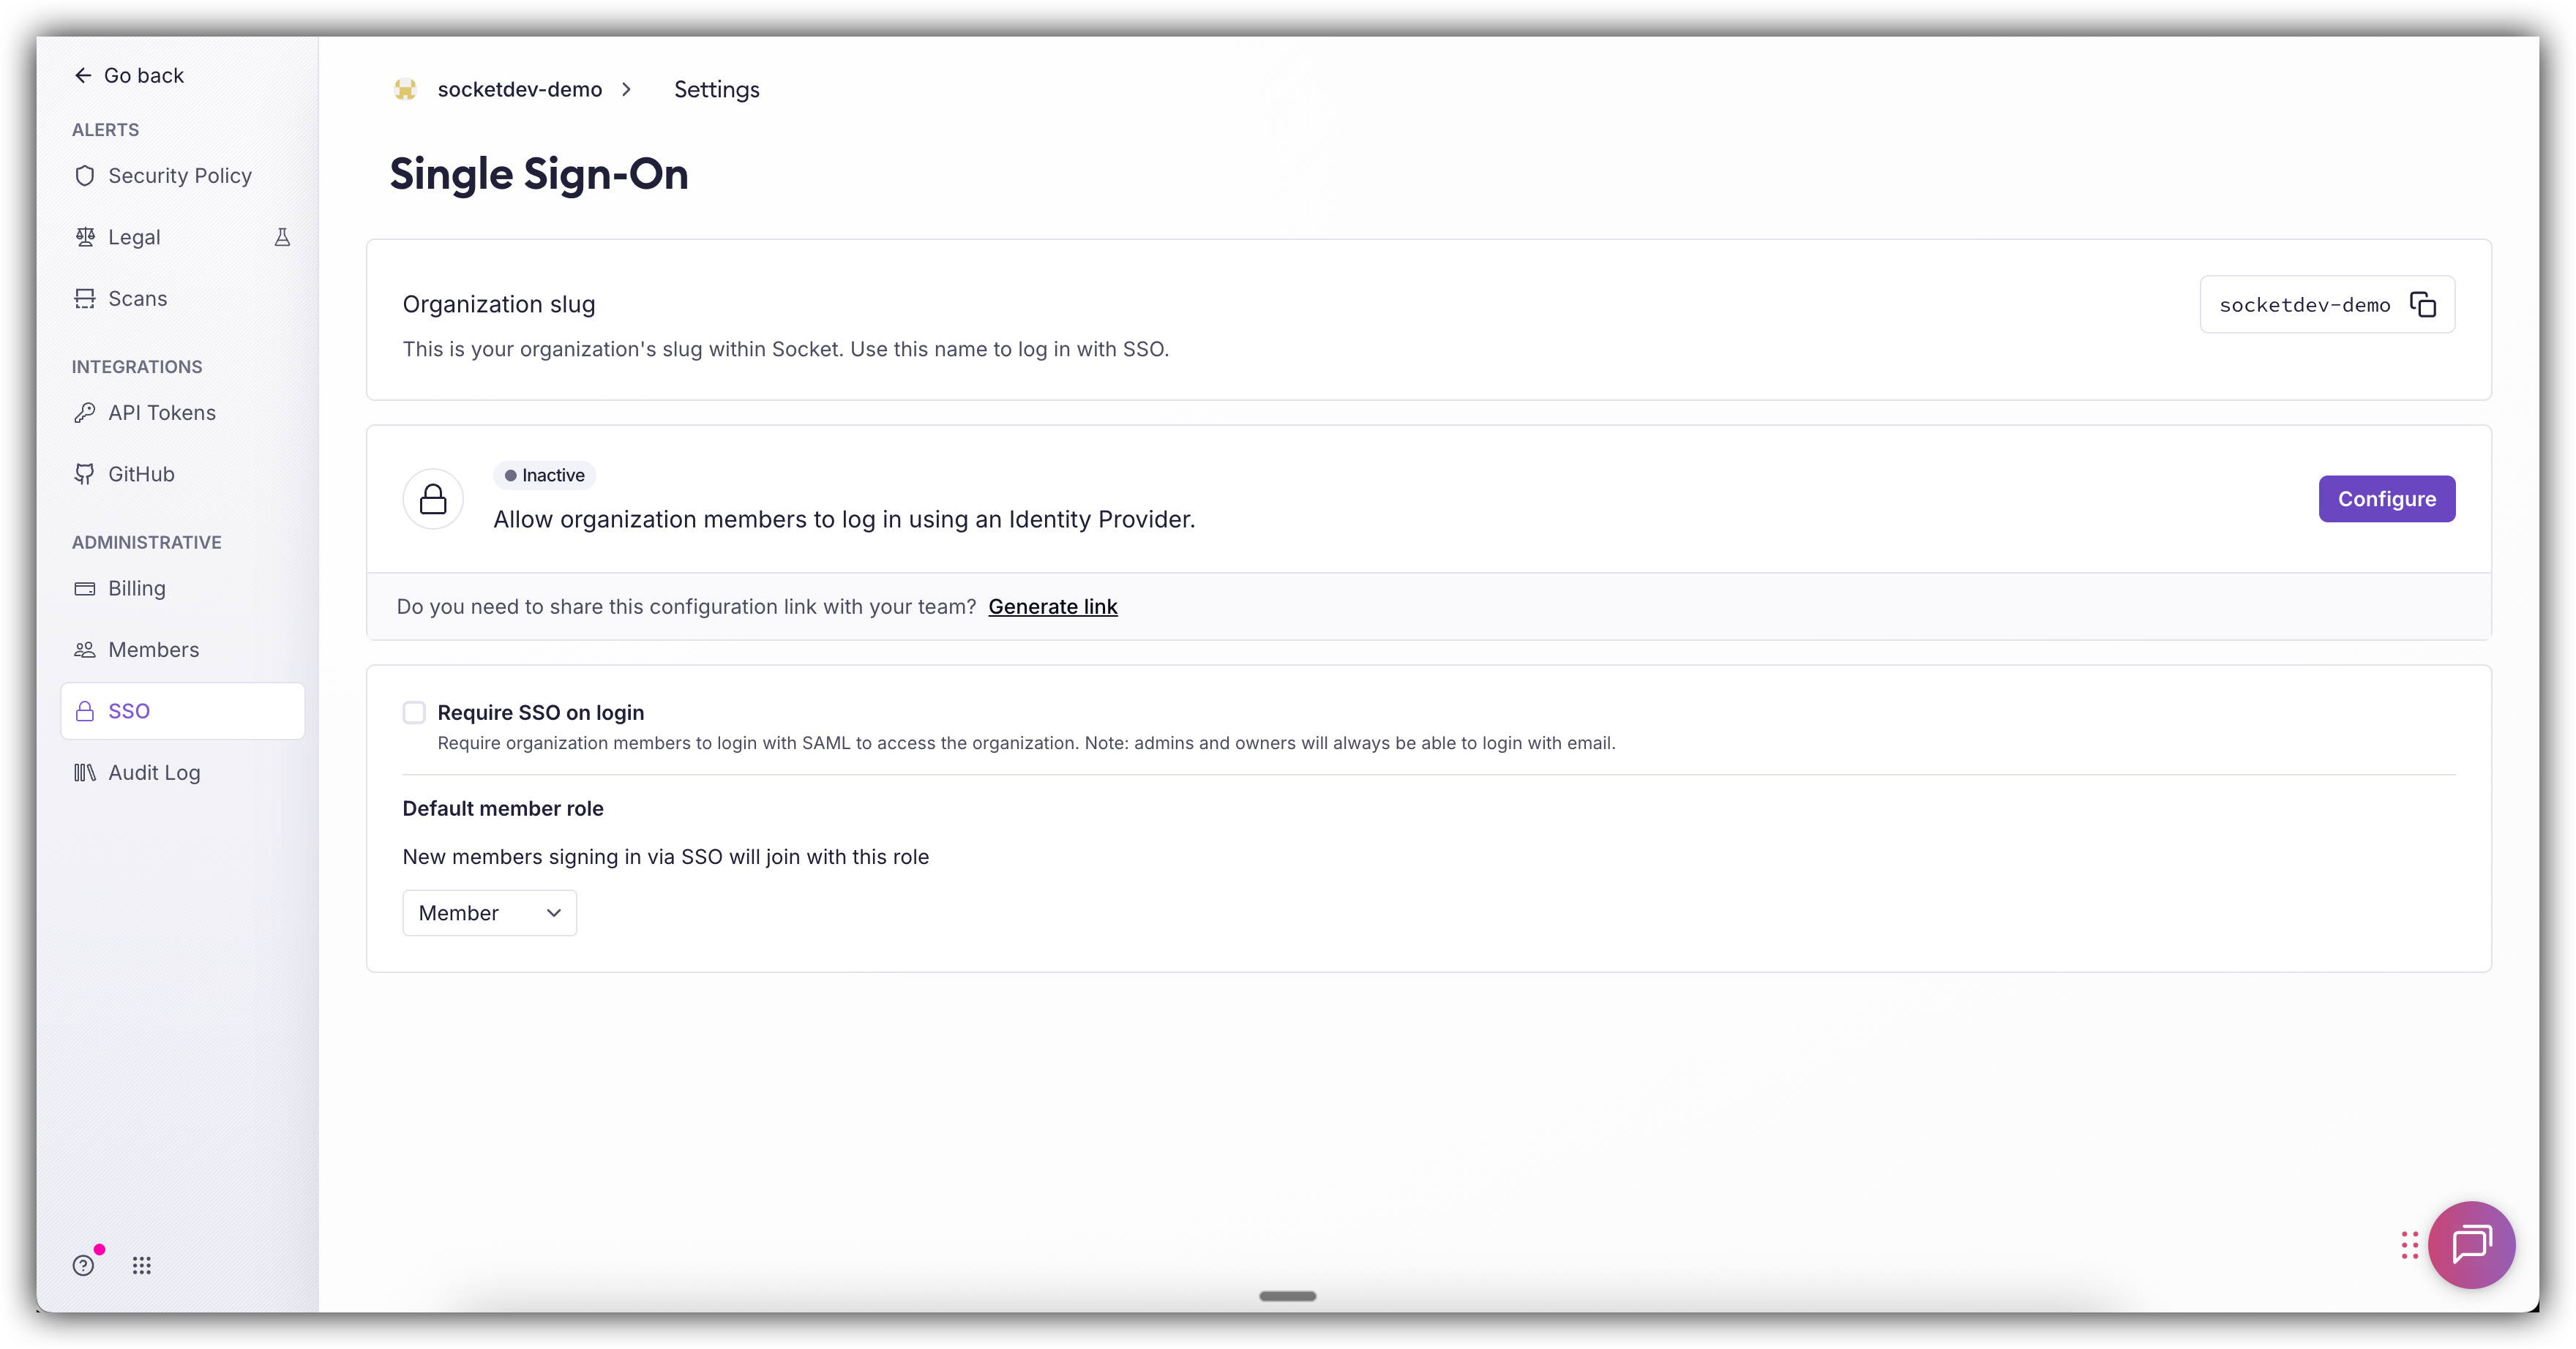
Setting Default Member Roles
- Define the default role for new members signing in through SSO.
- Ensure consistent role assignments across your organization.
Generating a Configuration Link for Team Members
- Create a configuration link to share with other team members.
- This link helps them easily set up their access via SSO.
Easy Setup Process
WorkOS Setup Assistant
For those new to SSO, WorkOS provides a detailed step-by-step tutorial to guide you through the configuration process. Setting up SSO with Socket is designed to be a hassle-free experience, ensuring you can get up and running quickly without additional IT overhead.
Steps to Set Up SSO with Socket
-
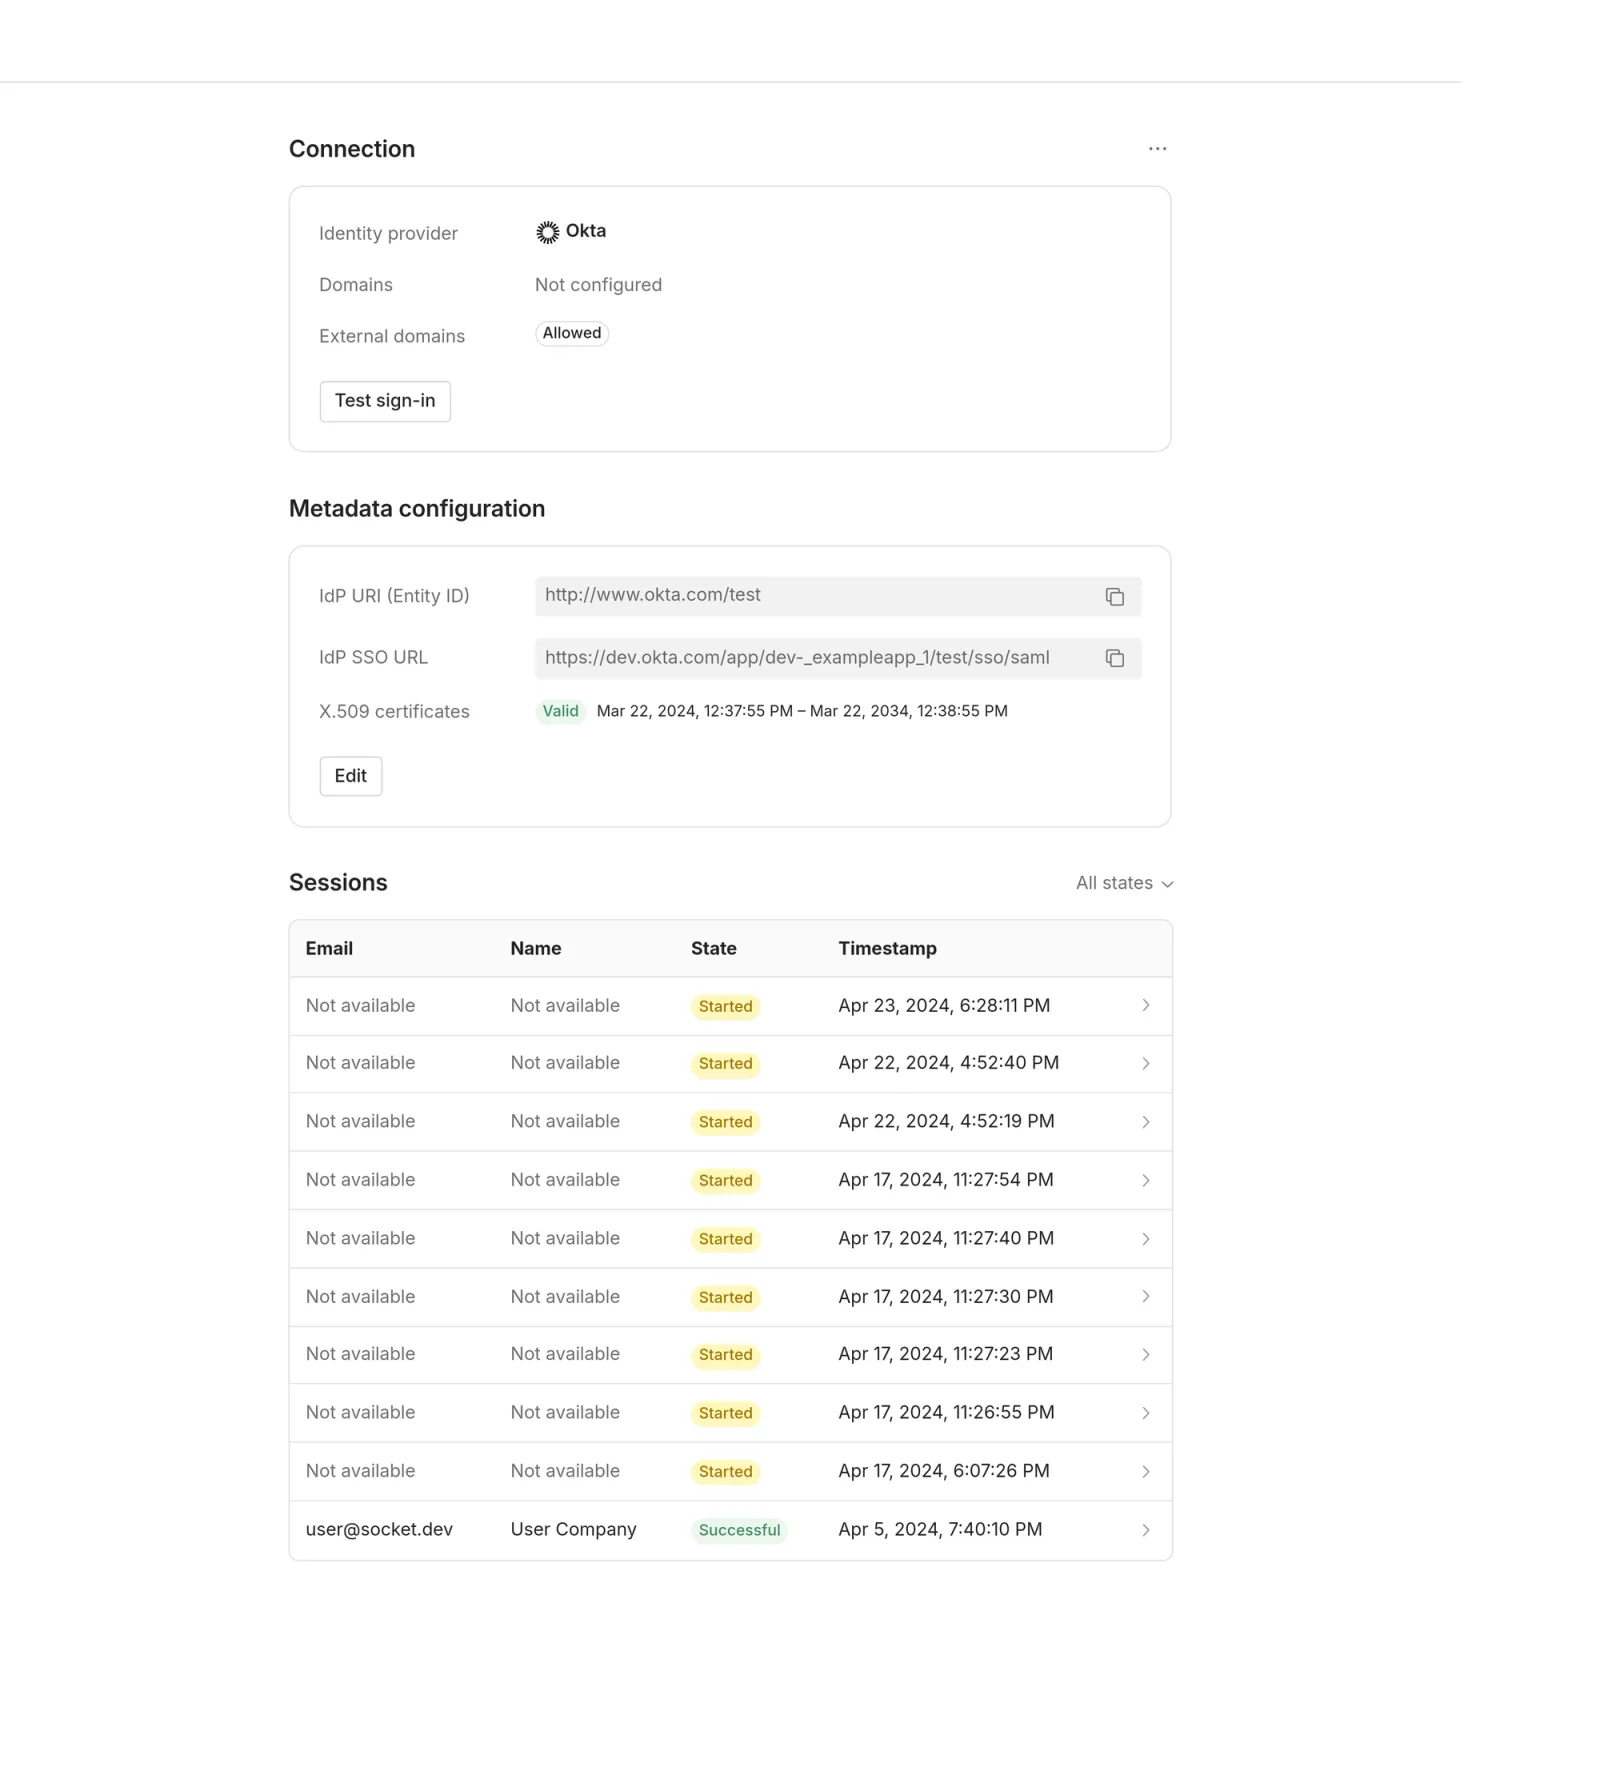
Follow the WorkOS Setup Assistant: Access the setup assistant provided by WorkOS by clicking on the configure button in the Socket dashboard.

-
Configure Your Identity Provider: Set up your identity provider to work with Socket.
-
Complete the Setup in Socket: Finalize the configuration in the Socket Dashboard under the Settings » SSO menu.
Next Steps
- Monitor and Manage: Regularly check the SSO settings and manage user roles as needed.
- Support: Reach out to our support team for help or questions: [email protected].
By integrating SSO with Socket, you can enhance your security posture, simplify access management, and improve the overall user experience for your team. Enable SSO today and take advantage of these benefits.
Updated 10 months ago